


Wargaming Terrain
We’ve all seen them. Those gorgeous wargaming tables that have the most awe inspiring terrain on them and whenever we asked the guy that build them how did he actually do it, most of the times he will say: oh, you know, it’s easy! Well, it’s not as easy for some of us, and this is why we are here with a spectacular tutorial on how to do a field for your Bolt Action table (and not only) by Paul Thompson with incredibly detailed pictures and step by step description of the process. But don’t take my word for it, see for yourself:
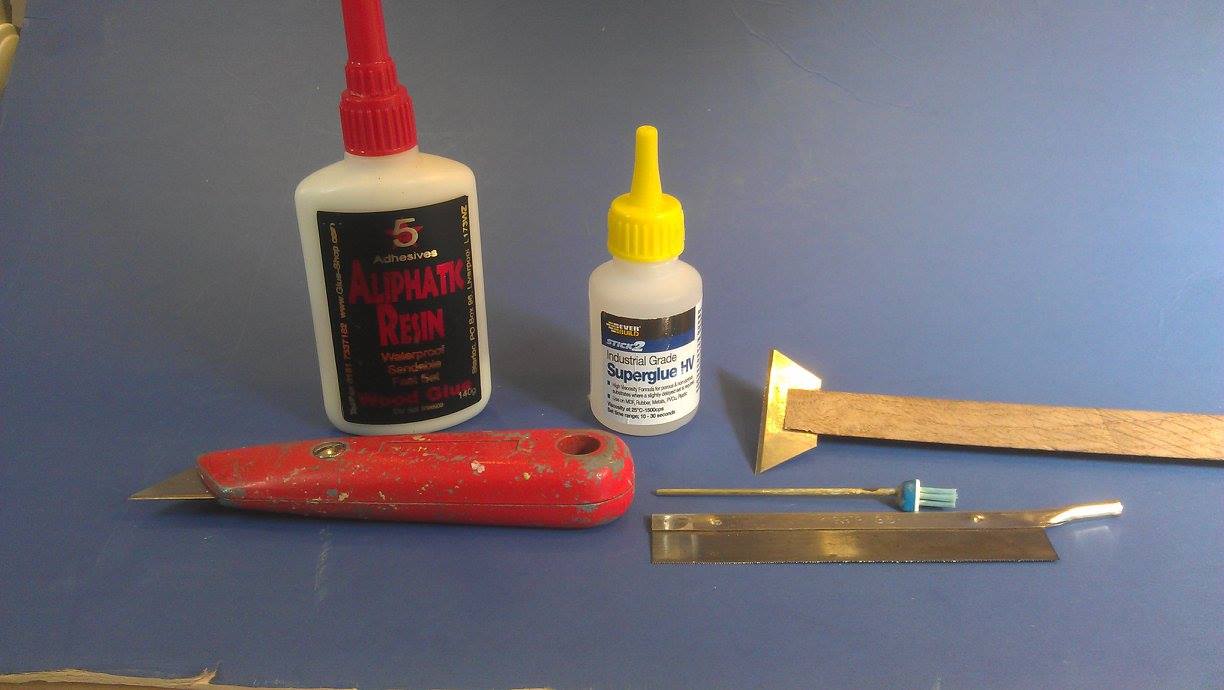
The tools I used to glue and cut all the items used in this tutorial. The two most use full items are the ‘dibber’ which is piece of toothbrush stuck on a piece of brash rod to use as a handle and the razor blade stuck on a wooden handle.

The paints I used in the finishing of the model. The AK old and weathered wood paint set is superb and I recommend it. The Woodlands scenics paints are all water based and mix together really well.
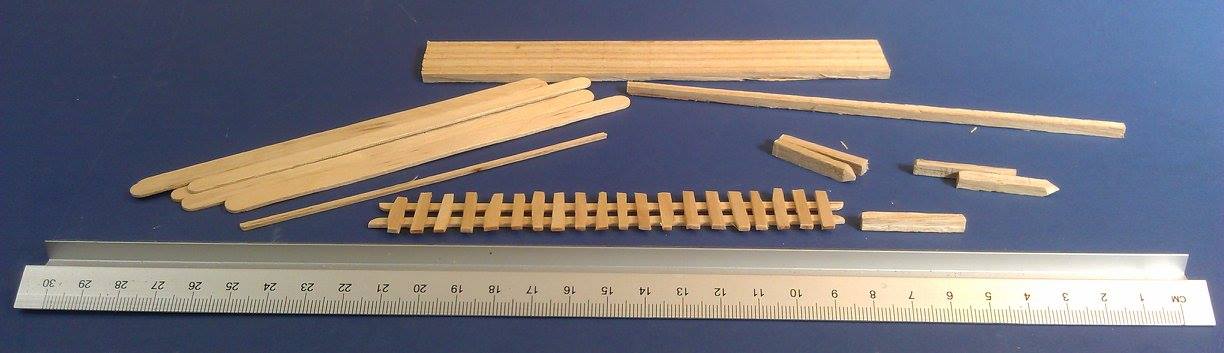
The fences and fence post are all made of real wood because it’s cheap!! The fence is made from coffee stirrers. The post are made from season ash cut into squares. In truth any wood would do for the posts it’s just I have a lot of it from a wood working job and so it was free always a driving force for me.
The start
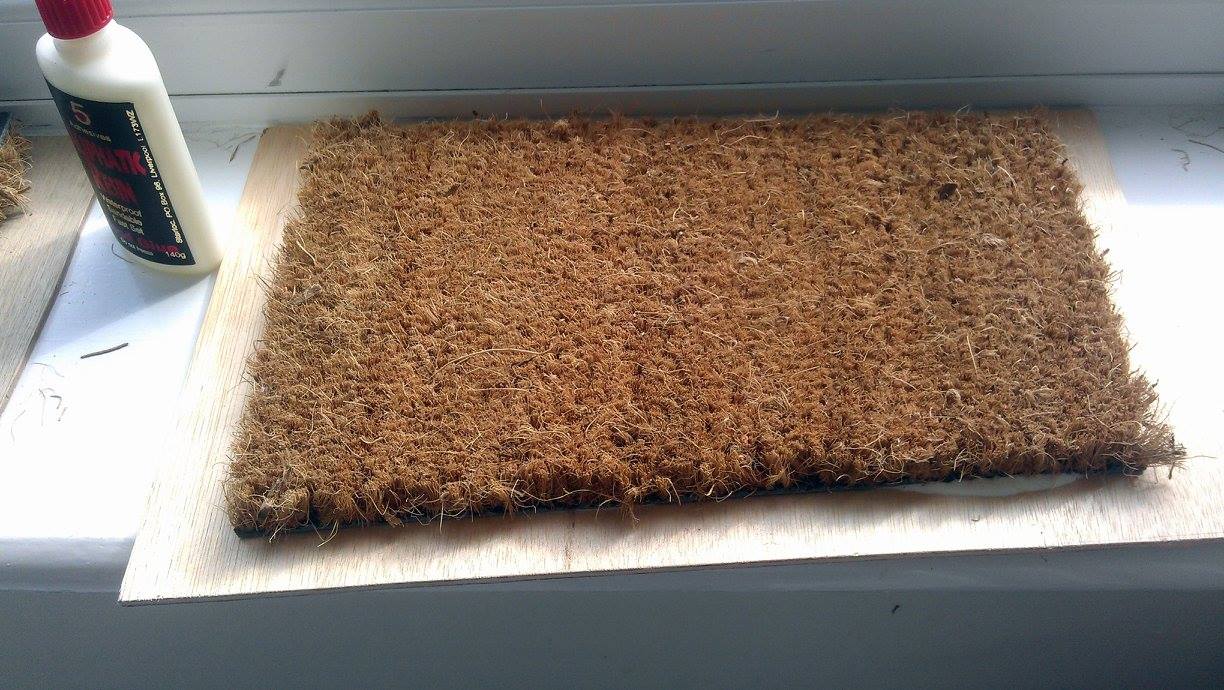
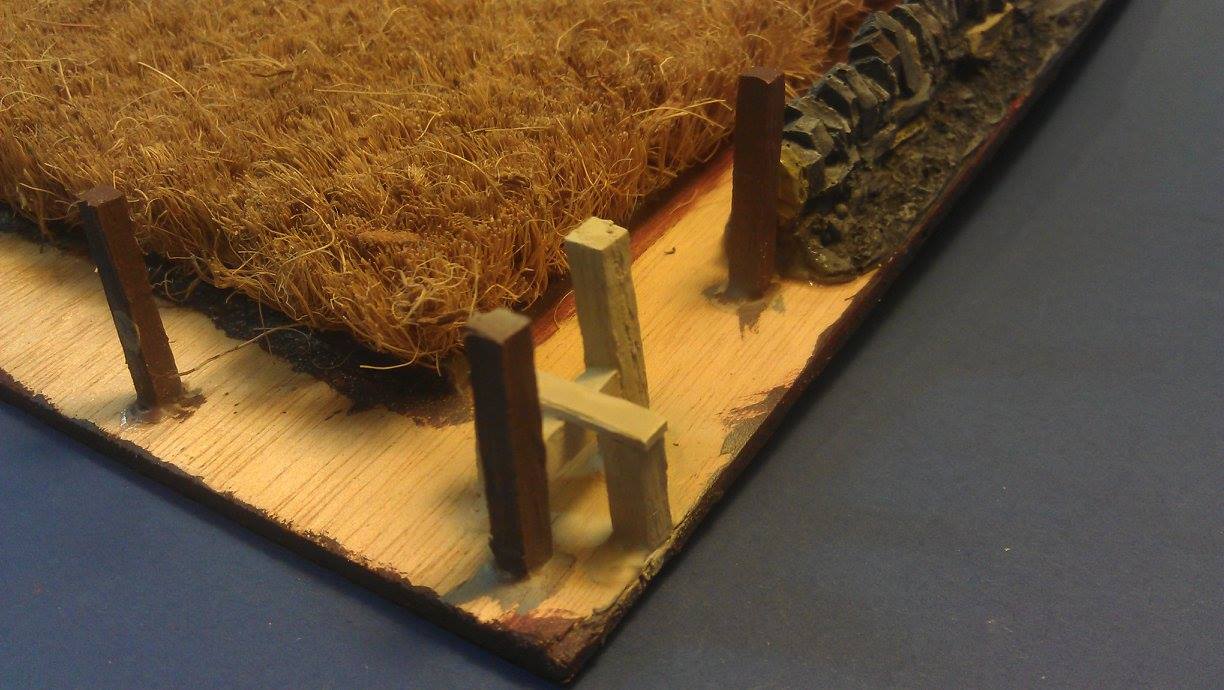
The ‘field’ is just the cheapest coir doormat that I could find. I choose a cheap one as all the expensive ones were to dense and didn’t, to my eyes, ‘look’ right. The base is 3mm plywood. The mat is cut so that you have ~1.5 inches around the field to place walls/fences etc any less and my fat fingers can’t get in to work on the gap between the field and the edges.
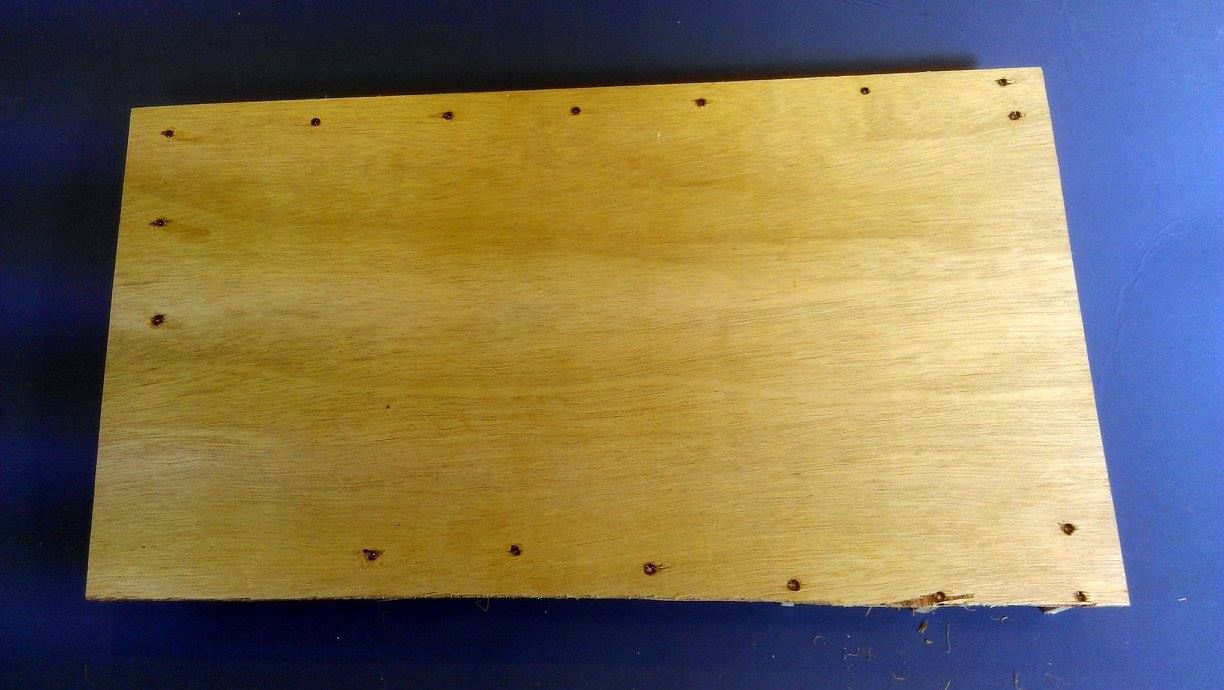
The previous piece turned over and drilled. Once the mat is glued in place and has dried. Using a drill, I use a dremel to drill holes completely through the plywood at points where I would place the fence posts. The holes MUST match the size of the fence post. I found that it was best that the hole was slightly smaller than the fencepost so that when glued it would be stronger.
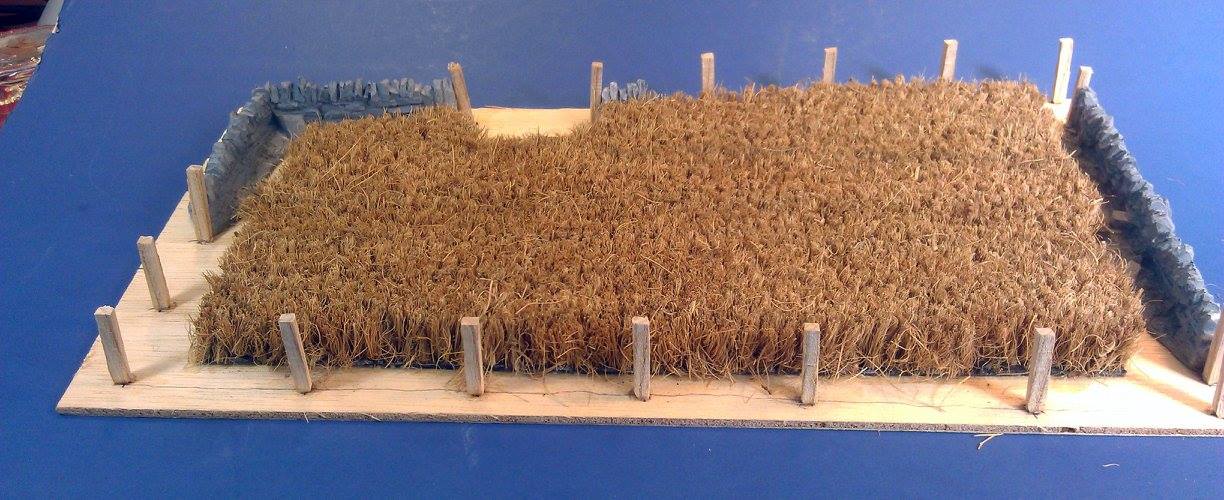
The base field with wall sections and fence posts in position. The walls have been primed in grey. The grey is a mix of 1:10 black:white vallejo primer which I use on pretty much everything these days. The square fence posts are gently tapped in place and superglued to make sure they stay in place. They need to be oriented correctly other wise it’s hard to get the fence panels to look right. With hindsight I should have completely painted the walls before I glued them in place they were difficult to paint once they were glued in place – so don’t make that mistake.
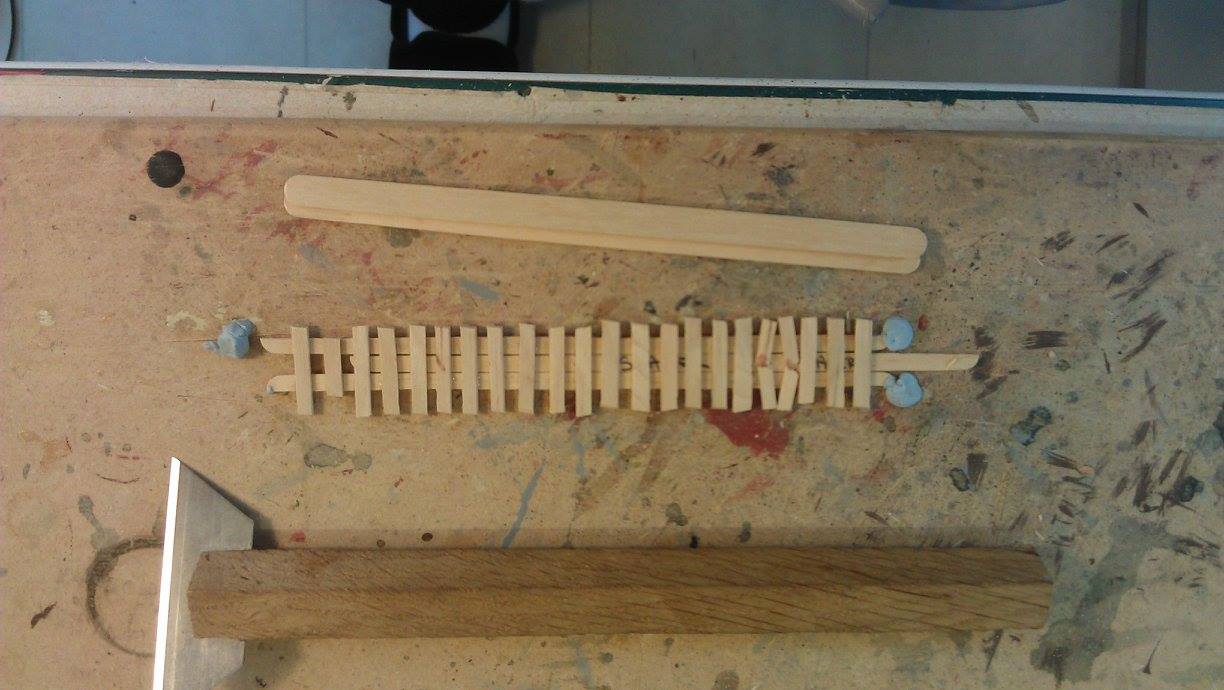
Making the fence panels. The coffee stirrers are cut into strips to use as the horizontal lengths. some of the horizontal strips are the cut into shorter lengths to act as posts. The posts are then trimmed so that are not all the same width as I though that looked wrong. The stanley knife blade is set into a piece of brown oak. This was an invaluable tool as it allowed me to cut the strips just so without the use of a ruler which I just couldn’t get right. Did I mention I have fat fingers?
You need to make a little jig where you have a spacer in between the two horizontal post to get the separation correct. I found that they splayed out if I didn’t do that. I used the Aliphatic wood glue to glue the wood pieces together as takes paint better than standard wood glue.
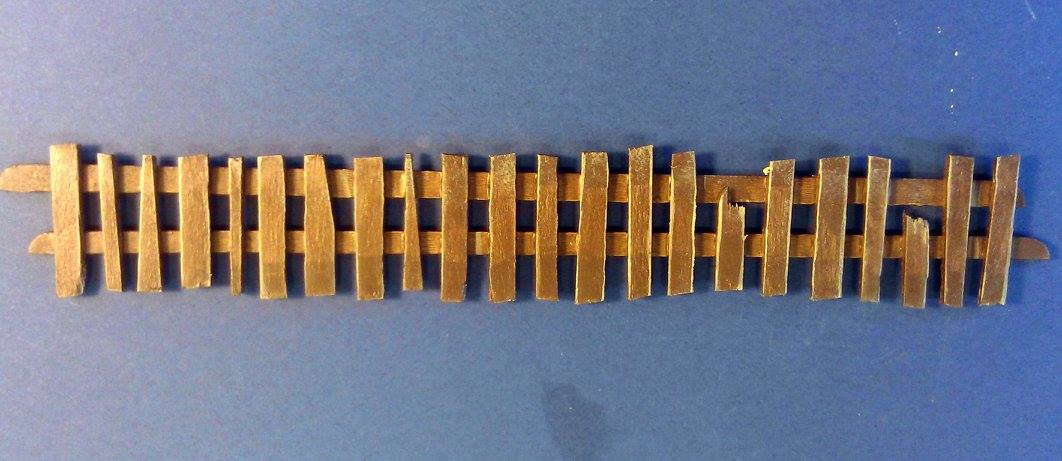
A finished section of fence you need a lot of them. After the glue has dried I primed them with my 1:10 grey mixed allowed it to dry overnight. Base was AK-Interactive freshly sawn timber followed by AK old wood. When dry it re applied, to the very, edges freshly saw timber to give some contrast to the fence panels. Notice the random widths of the verticals I initially tried it with uniform verticals but it look to uniform. Almost every panel had a damaged or broken vertical to break up the uniformity.
Finished panel
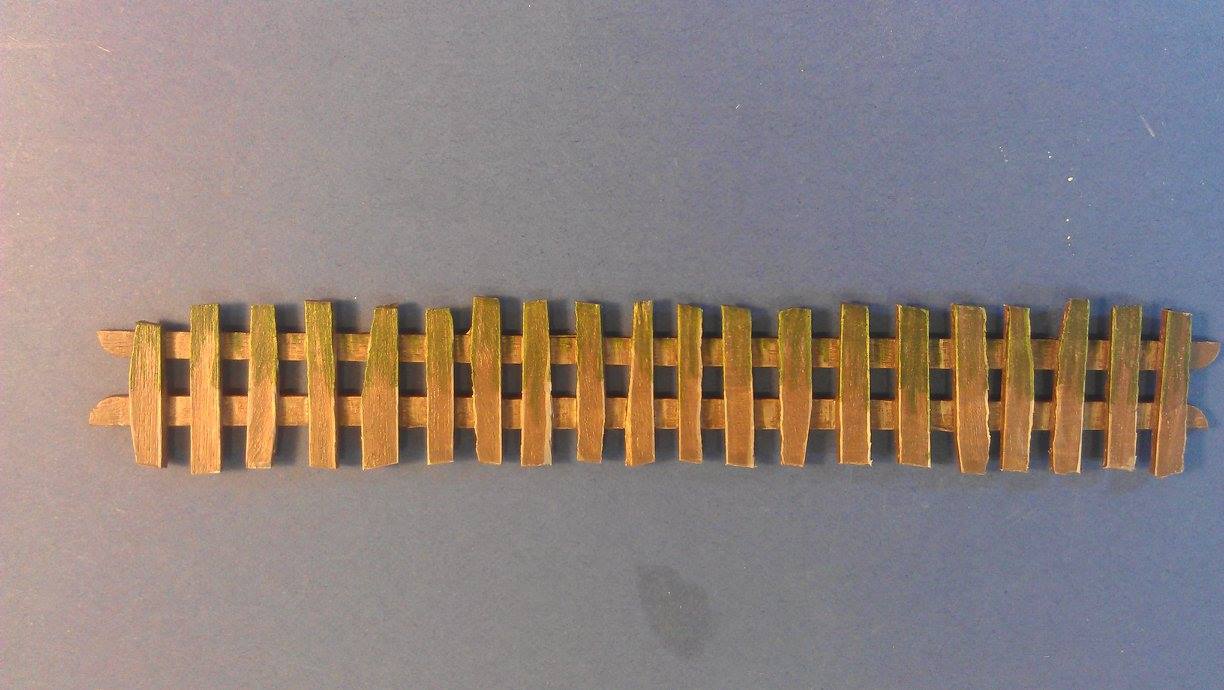
The green is dark streaking grime followed by a highlight of light streaking grime again to give it some interest. In hindsight I made the streaking to uniform and I should have made it much less uniform.
To apply the panel to the fence posts it is cut to length and superglued in place. Where edges of panels ‘butt’ together AK old weathered wood paint is used to conceal the join. If you have oriented the fencepost’s correctly the panels just go on perfectly if not some fiddly work is needed.
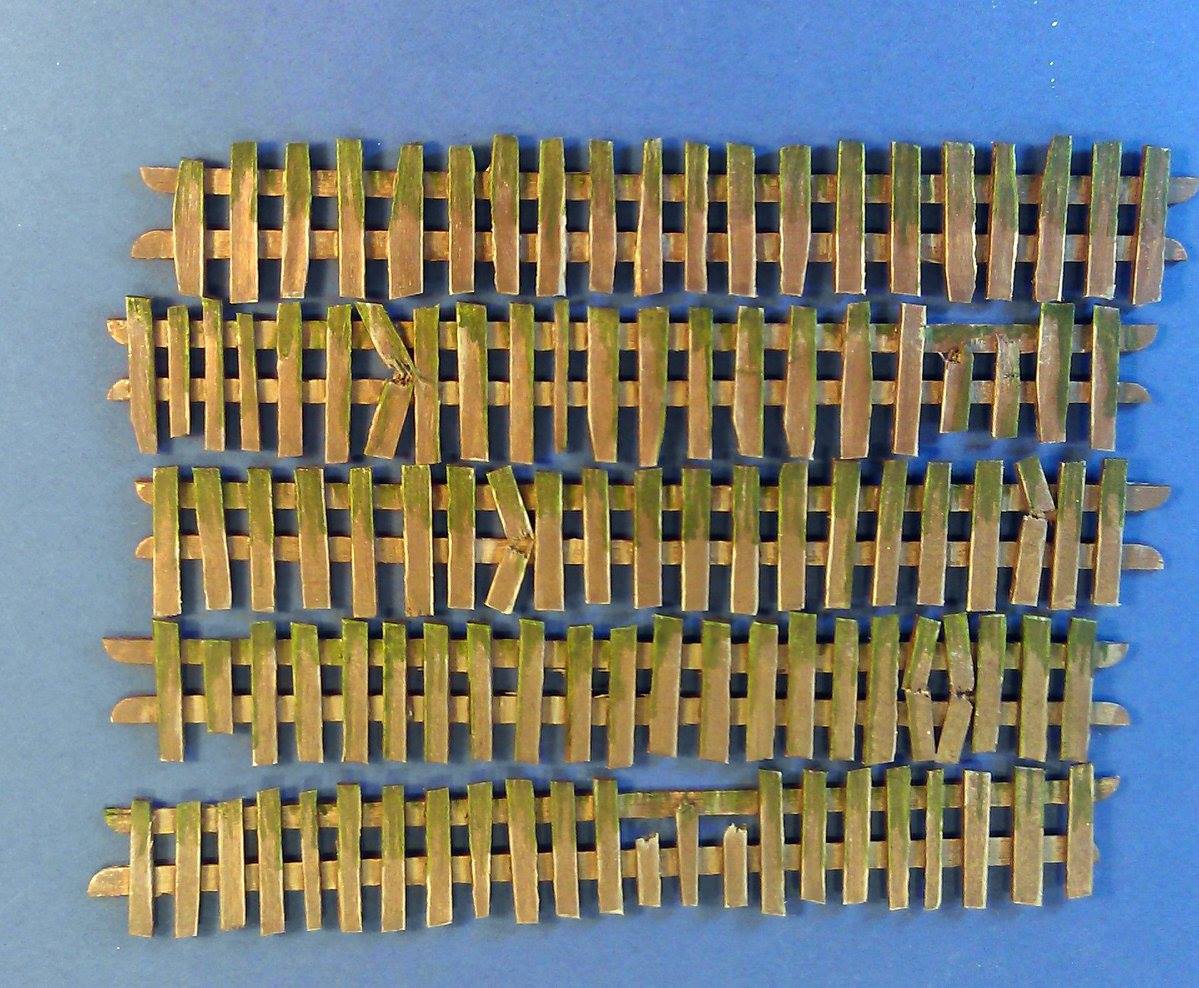
Did I say you need a lot of them…. The broken verticals do break the uniformity up and make it far more interesting that it would otherwise be.
Just fence posts and walls are a bit plain so I added a style for a bit of interest.
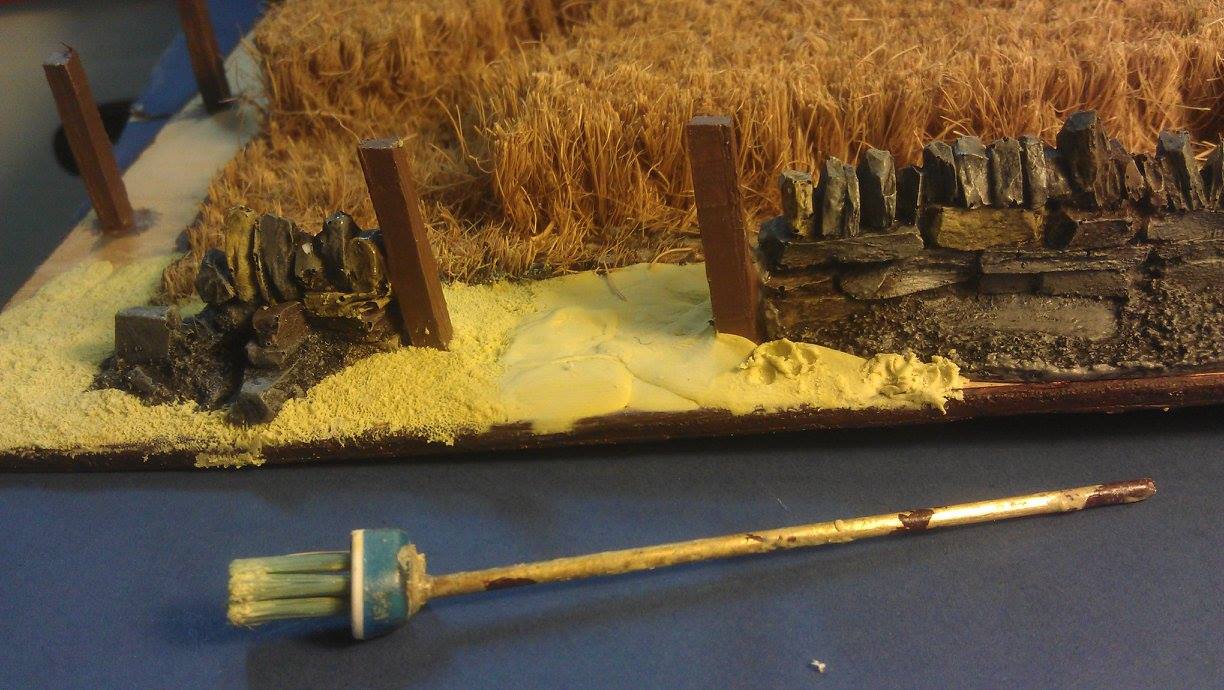
Next step is groundwork
I use milliput. The ground is done in sections each taking ~15/20 mins in duration and 6/8 in length. The milliput is mixed and simply pushed on to the plywood. It is textured with the piece of toothbrush mounted on the handle.
The dibber is used to make it look like earth and give it a good texture for the paint to accent. The small size of the dibber allows you to push the milliput flush against the scenic elements so that they look homogeneous.
On the left is the groundwork after it has been worked into position with the dibber the right is when I have just pushed the milliput onto the based but before it is worked on.
The wall was painted using the woodland scenics water based paints – see earlier picture for the colours used. I’ll say again I should have painted it before I glued it to the base.
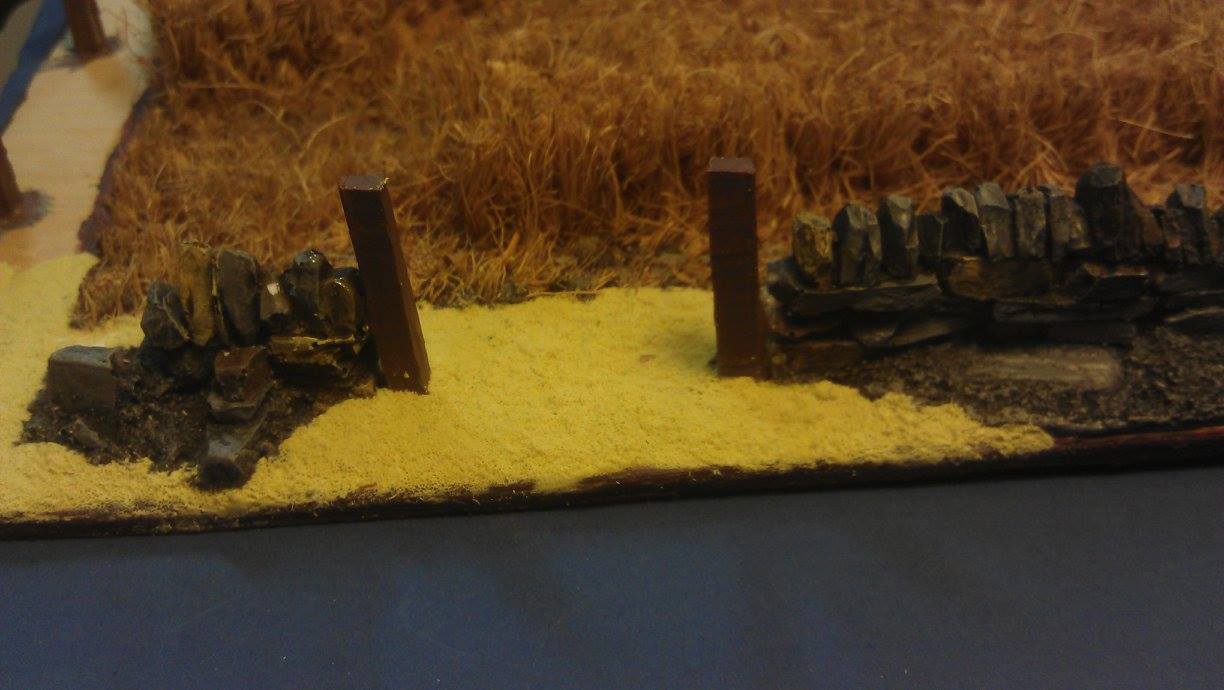
Same section with the ground work completely finished. It now buts up against the wall/field/post correctly with no gaps.
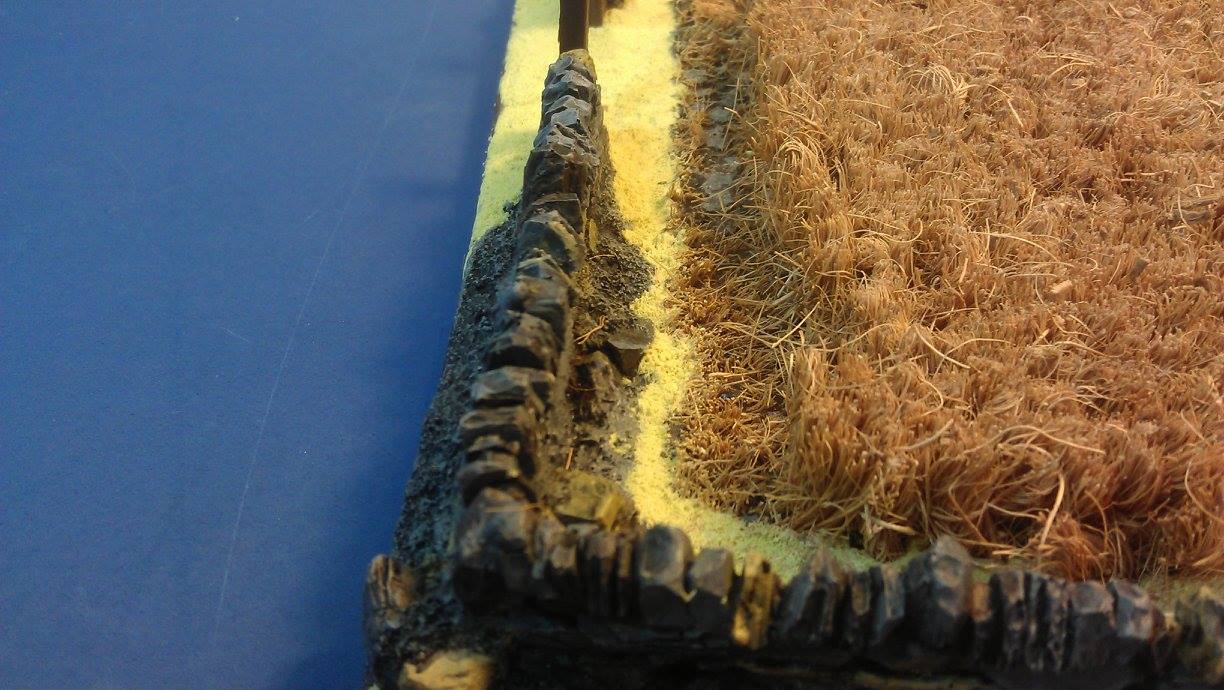
A section of the groundwork in between the field corner and the field. Again the dibber allows you to get the ground work flush with the field and wall with no gaps.
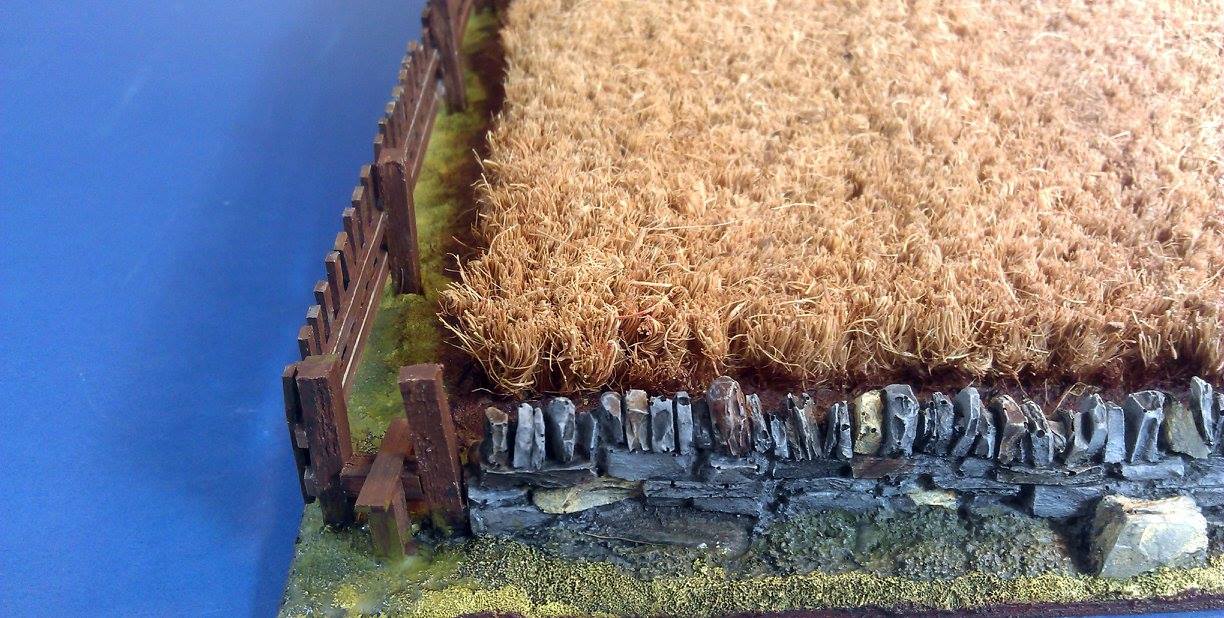
A section of the wall, fence and style showing how the ground work looks when painted and how you can’t see the joins between the milliput and the wall. The groundwork was simply washed with the water based woodland scenics paints I just slapped several thin coats of several colours on the milliput until I liked the look of it.

The entrance to the field again showing the ground work. The brown edge to the field is Citadel scorched brown I applied a thin band all around the cornfield to break up the uniformity of the groundwork and it looks nice.
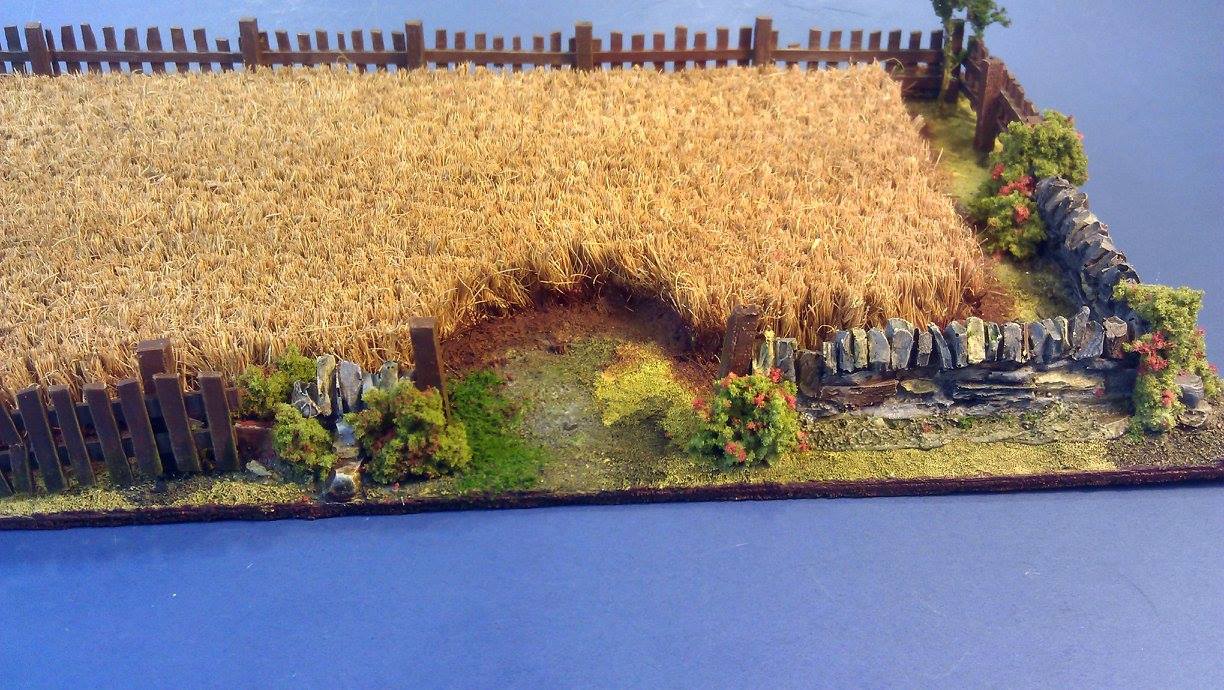
Almost there. At various points on the base there are gaps between scenic elements so to hide the gaps and give it more colour and texture I used clump foliage for that. The foliage was glued in place with superglue and them give a good spray of scenic cement. When dried. I gave just the foliage a second spray of scenic cement. Whilst wet I scattered some reddish foam rubber that I had cut up really, really fine on the foliage to break up the green as it looked to green and give the appearance of flowers.
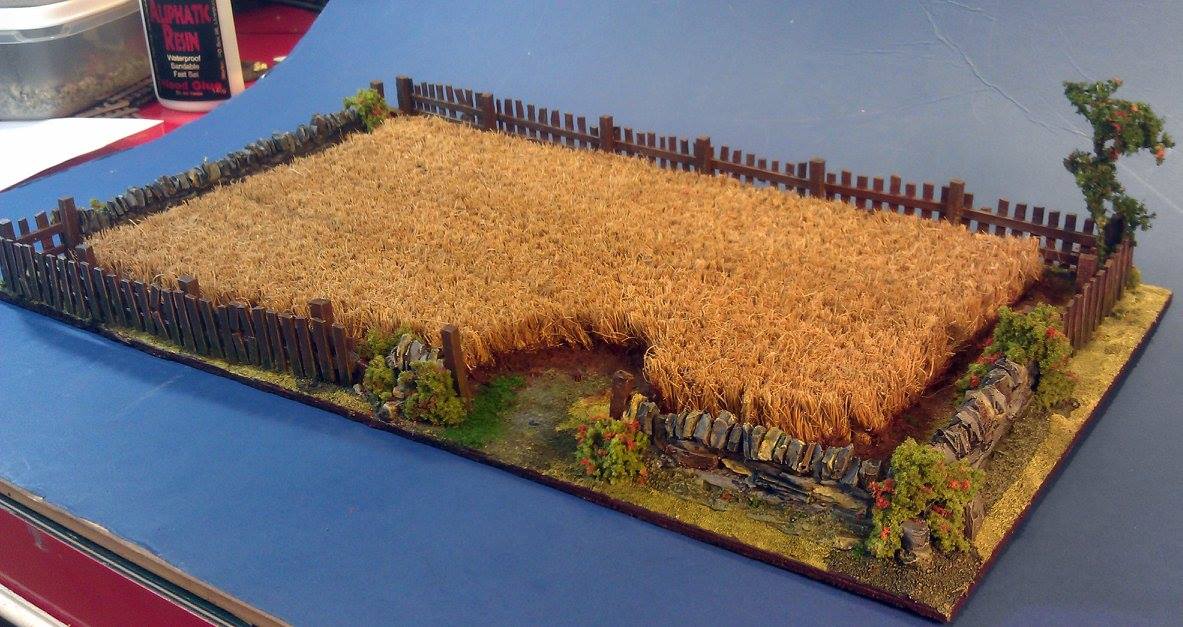
Finished. The edge of the board was painted scorched brown rather than leave it plain. I toyed with using a black edge but that didn’t seem right. On balance I think a green that matched the playing surface that I would be playing on would have looked better or maybe not…..
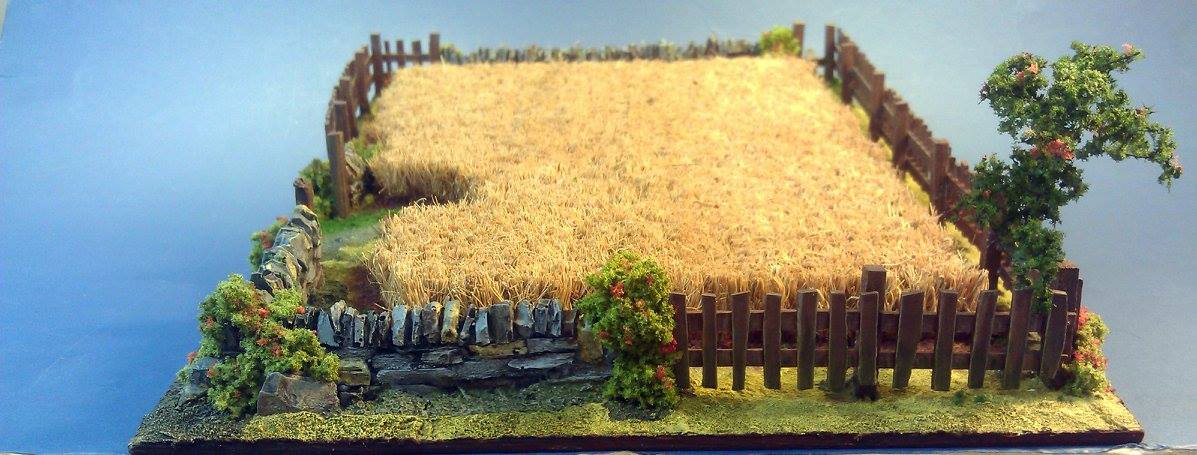
Same field different view.
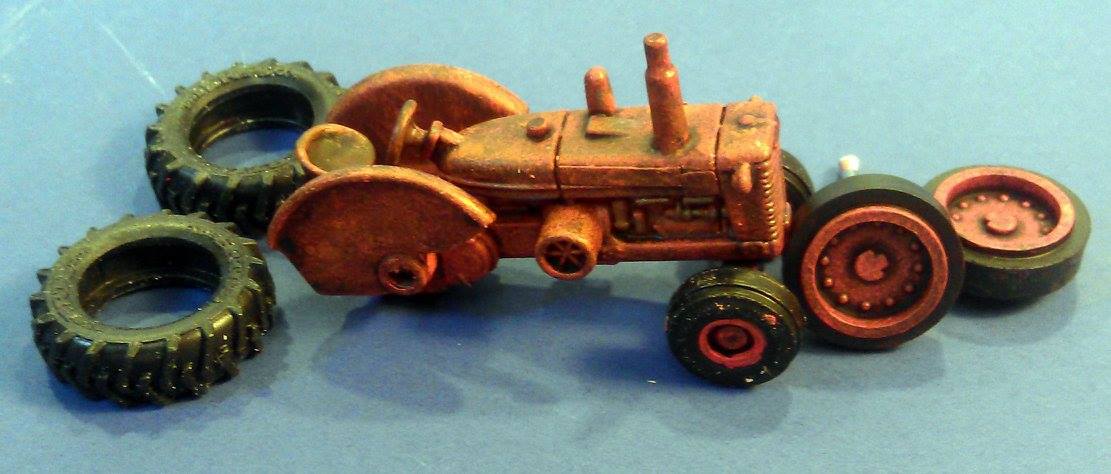
A rusty tractor.
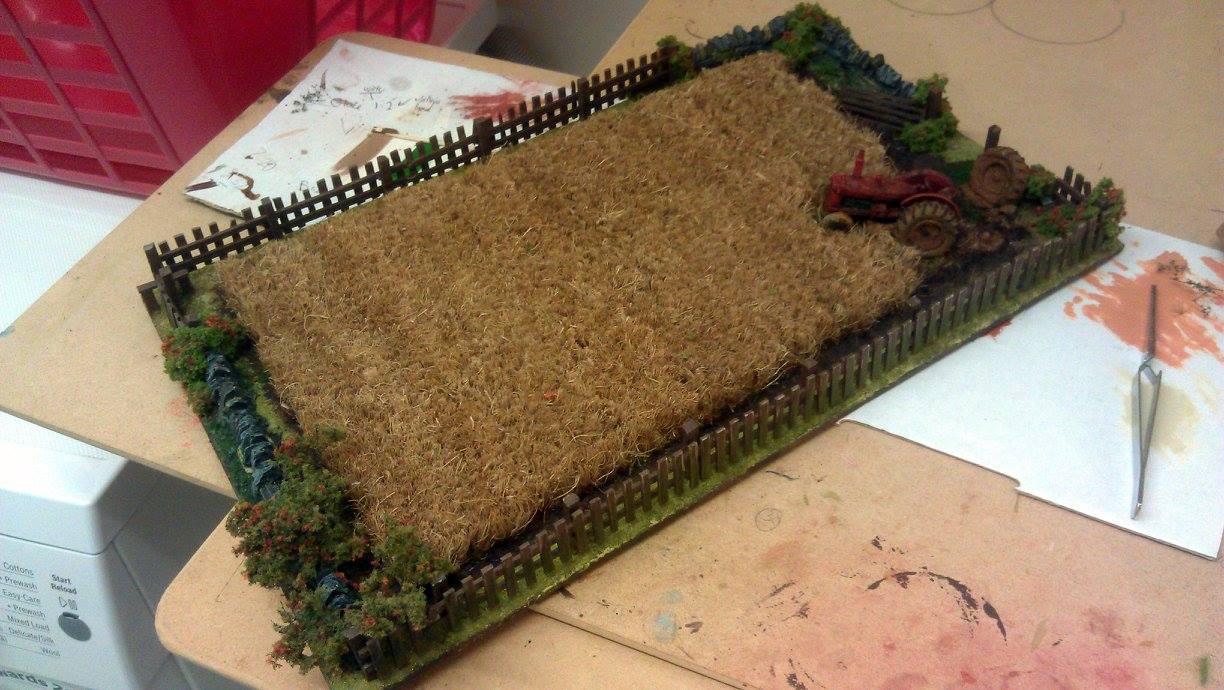
This is my 3rd field made the same way as described in the previous pictures.The field was a bit plain so in this one I added a rusty tractor and a gate to give it more interest. The downside of adding a tractor is that it can only be used in Bolt Action. whereas the other fields can be used for any period really.
And that’s the end of the tutorial! Did you enjoy it? Will we see many more fields being added to our wargaming tables? I think so! For more terrain tips, you can check out this article: Wargaming terrain: Making muddy roads.
nais
Very, very nice!
Very, very, very nice.
Tony
Awesome Job
That is beautiful work. Is it my imagination, or did you lighten the rug/field in later pictures?
Might be the light?
Wow amazing gonna make my own
Great looking fields. I would love to find a mat to use, bit no luck. But I have not be able to find one anywhere.
that’s great work! I’ve made some ploughed fields, but I think I’ll follow your tutorial and make some with crops.